Tech problems can be pretty complex, which makes them hard to describe over the phone. A built-in Windows tool you may not know about helps both parties to find a solution more effectively. Steps Recorder boosts long-distance understanding.
This guide explains how this native feature works and how it can make your life easier. You’ll be able to record your steps before encountering a tech issue. By reproducing how you got there, your technician can help you find a solution more quickly.
Steps Recorder comes with all Windows computers
This handy solution is free, simple and easy to use. Steps Recorder is native to your computer, so you don’t have to download anything to your PC.
Essentially, this tool takes screenshots to which you can add comments. For instance, you can take a screenshot of a program that isn’t working and type a caption like, “My computer froze when I hit the start button here.”
Just like that, you’re giving the other person a crystal clear image of how the tech issue came about. This is useful for two reasons:
- When getting help from an IT professional, you can record your screen to show how the problem occurred.
- When helping someone fix a tech problem, you can show them the steps they need to take to correct it.
Unlike most screen recorders, Steps Recorder is specifically designed to solve troubleshooting issues. It records your actions but not your voice, so you’ll have to add captions to clarify.
Pros and cons to keep in mind
Before we explain how it works, here’s a quick overview. Like most any program, it has advantages and disadvantages.
Let’s say you have a tech issue you need help with. Here’s all you need to know:
| ✔️ Steps Recorder helps you record detailed steps you took on your computer. | ❌ It can’t record videos, audio, gameplay or GIFs. |
| ❌ It can’t record videos, audio, gameplay or GIFs. | ✔️ It takes screenshots of whatever you’re doing. You can then turn your steps into a slideshow. |
| ✔️ Have a dual monitor system? It can record both displays. 📹 Want to record just one screen? Follow these steps. | ❌ Steps Recorder only saves your slideshow recordings as ZIP files. |
Now that you know the ins and outs, let’s dive into the action.
RELATED: Save space on your computer by disabling these 7 Windows 10 features
How to use Steps Recorder
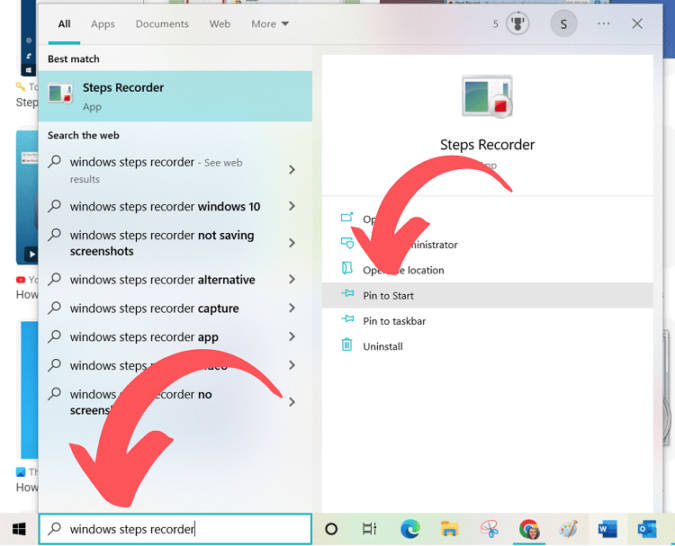
Type Windows Steps Recorder into your search bar. Select Open when the app pops up.

If you’re still using Windows 7, you can use this program — but it’s under a different name: Problems Step Recorder. However, we don’t recommend sticking with Windows 7 since it doesn’t get patch updates. Tap or click here for more cybersecurity tips for your PC.
- After you turn it on, a pop-up window gives you three options: Start Record, Stop and Review and Settings.
- Hit Start Record to begin your recording. Retrace your steps to show someone where your tech issues started.


- When you’re done, select Stop Record.
- Lastly, review the slideshow to make sure it shows every step of the way. When you’re done, select Save.
- Name the file, pick a file location and select Save again.
Just like that, you have a file you can send to an IT troubleshooter. It’s also beneficial for family tech gurus who spend too much time trying to solve tech issues.
Tell your loved ones about this program by sharing this tip. Tell them to start recording their steps from now on. Once you tell them it will save both of you time, they’ll begin to use Steps Recorder — and troubleshooting will be easier.
Sometimes, though, a problem is too complex to solve with Steps Recorder
In that case, we recommend the top-star team at our sponsor, Dell Technologies. Here’s why.
Sometimes it feels like the world is throwing everything it has at you. To succeed, you need someone to guide you through. That’s what Dell Technologies Advisors do. They have the tech advice to help you navigate whatever challenges you’re up against — and get you safely to where you want to be.
Call a Dell Technologies Advisor today at 877-ASK-DELL or go to Dell.com for free expert support.
Read more
Setting up a new PC? 5 must-do steps for seniors
Five great tools to remove pesky programs on your Windows PC

